
I was looking for offsite backup for my ubuntu server which has ZFS file system. I used Sanoid to take snapshots and Syncoid to replicate the snapshots to a different pool on seperate disk. Now, I want to replicate the snapshot to AWS Glacier.
I found a great tool “zfs-to-glacier” by Anders. Following how-to document is based on the instructions given in github repository.
Prerequisites
You need to have zfs snapshotting mechanism already in place. This tool will only replicate the snapshots to AWS Glacier
Update the Installation
It is always a good approach to install latest updates
sudo apt-get update
sudo apt-get upgrade -y
Package Download
Download the binary from the Github page. I am using the latest binary available at this time.
sudo su -
cd /usr/local/bin/
wget https://github.com/andaag/zfs-to-glacier/releases/download/release-e6c376993da13ec0295999cc332b445338b9f5c2/zfs_to_glacier_amd64
chmod 755 zfs_to_glacier_amd64
Local Configuration
Generate the local configuration. This will create file name “config.yaml” in present working directory
cd /root/
zfs_to_glacier_amd64 generateconfig
Edit Local Configuration
Edit the config.yaml and update the pool from where you want to replicate the snapshots. In my case, it is raidpool. Here is how the file looks like:
- pool_regex: "raidpool/.*"
  incremental:
    snapshot_regex: "daily"
    storage_class: "StandardInfrequentAccess"
    expire_in_days: 40
  full:
    snapshot_regex: "monthly"
    storage_class: "DeepArchive" #minimum storage period as of this writing is 180 days for deeparchive.
    expire_in_days: 200
  bucket: "zfs-raidpool" #You can backup multiple pools to one bucket.
Cloudformation Configuration
Execute following command to create equivalent configuration file for cloudformation.
zfs_to_glacier_amd64 generatecloudformationYou will get file with name cloudformation_zfsbackup.yaml. The Cloudformation file will looks like this:
AWSTemplateFormatVersion: '2010-09-09'
Description: ZFS backup config
Resources:
  ZfsRaidpool:
    Type: 'AWS::S3::Bucket'
    Properties:
      BucketName: 'zfs-raidpool'
      AccessControl: Private
      PublicAccessBlockConfiguration:
        BlockPublicAcls: true
        BlockPublicPolicy: true
        IgnorePublicAcls: true
        RestrictPublicBuckets: true
      LifecycleConfiguration:
        Rules:
          - Id: DeleteFull
            Prefix: 'full/'
            Status: Enabled
            ExpirationInDays: 200
          - Id: DeleteIncremental
            Prefix: 'incremental/'
            Status: Enabled
            ExpirationInDays: 40
          - Id: AbortIncompleteMultipartUpload
            Status: Enabled
            AbortIncompleteMultipartUpload:
              DaysAfterInitiation: 7
  CustomUser:
    Type: 'AWS::IAM::User'
    Properties:
      UserName: 'BackupAccount'
      Policies:
        - PolicyName: 'CustomRole'
          PolicyDocument:
            Statement:
              - Effect: Allow
                Action:
                  - s3:PutObject
                  - s3:GetObjectTagging
                  - s3:PutObjectTagging
                  - s3:ListBucket
                  - s3:AbortMultipartUpload
                  - s3:ListMultipartUploadParts
                Resource:
                  - !Join ['', ['arn:aws:s3:::', 'zfs-raidpool' ]]
                  - !Join ['', ['arn:aws:s3:::', 'zfs-raidpool/*' ]]
Cloud Formation
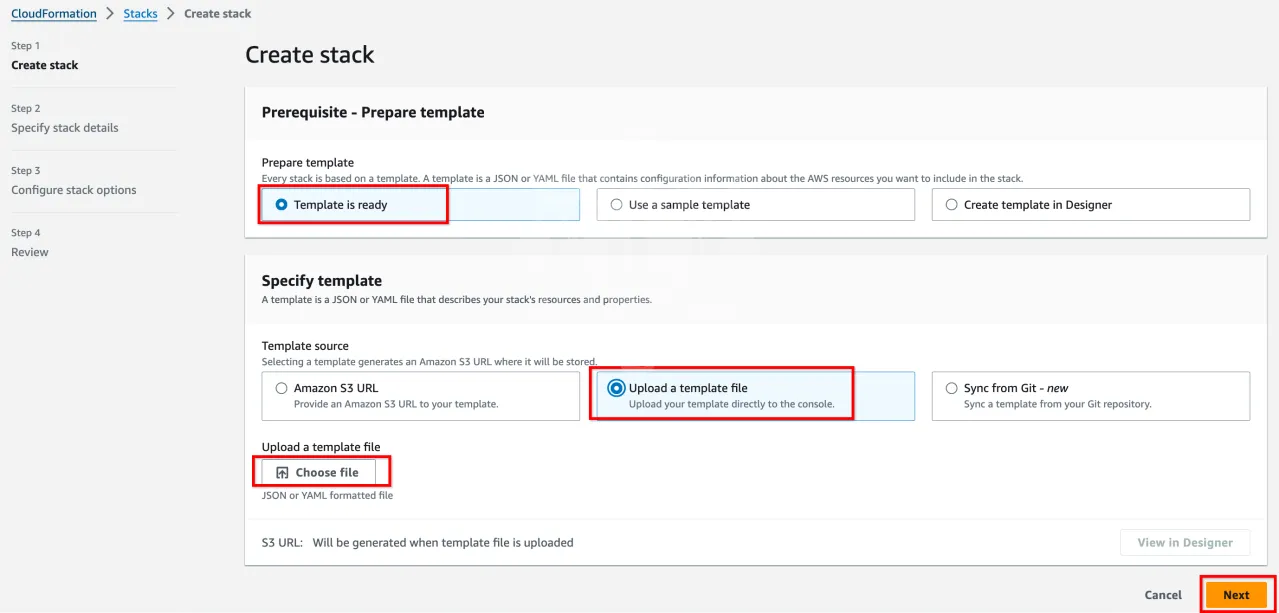
Login to AWS Console and Upload the yaml file to CloudFormation to create new stack. Once process is complete, you will get to see a new bucket and User created
Access Key
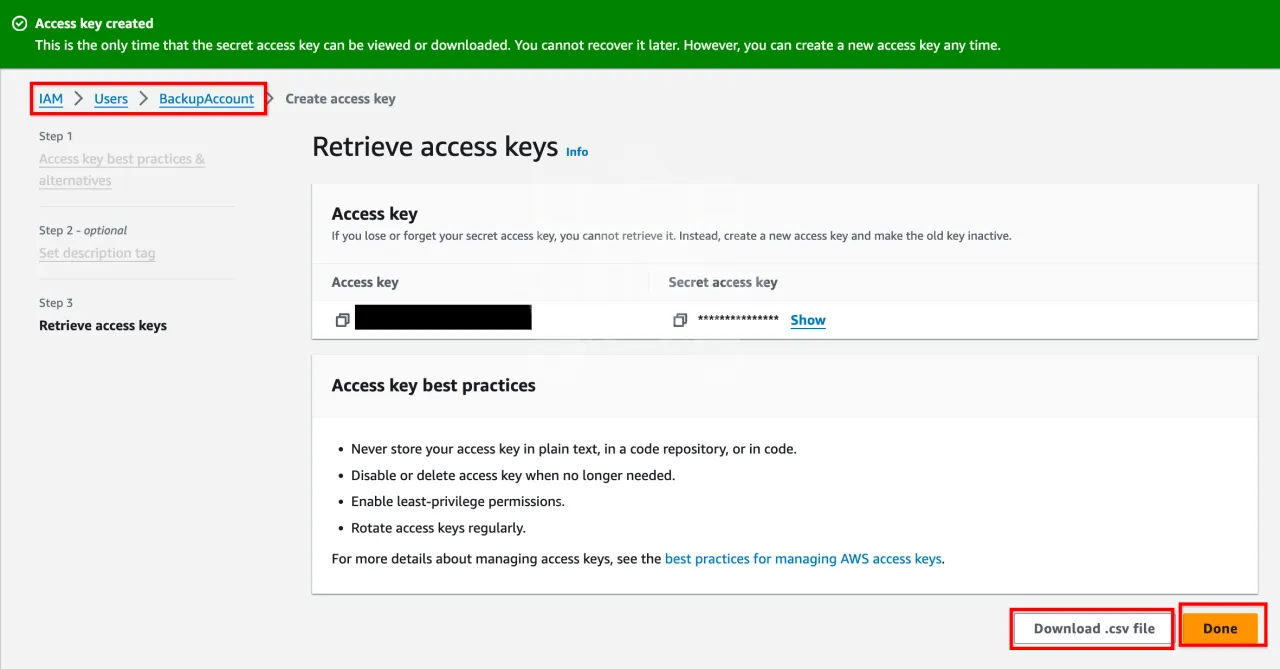
Go to IAM user page and download the Access Key for this newly created user. In my case, it is BackupAccount
AWSCLI Installation
Install AWSCLI tool
apt-get install awscli -yConfigure Access Key
Configure it with the Access Key we just downloaded.
aws configureInteractive input:
AWS Access Key ID [None]: XXXXXXXXXXXXXXXXXXX
AWS Secret Access Key [None]: yyyyyyyyyyyyyyyyyyyyyyyyyy
Default region name [None]: us-east-1
Default output format [None]:
Dry Run
Use the following script to dry run and size estimate for the backup
zfs_to_glacier_amd64 sync -v -n
zfs_to_glacier_amd64 estimate_size
Sync Script
You can use the following script via cron to start the replication. There is a better script mentioned in the repository
#!/bin/bash
nice zfs_to_glacier_amd64 sync -v &> /var/log/awsbackup.log

