
I had setup Openconnect VPN Server on my CentOS 7 Linux VM. I wanted to use the same port 443 for accessing my VM using SSH. The reason is, my ISP has blocked most of the ports including SSH port 22 except port 443. In this article, we will use port 443 for running multiple services.
Prerequisites
We are going to install the HAProxy on CentOS 7. This article assumes that you have VM available which has Openconnect VPN running as well as VM is accessible via SSH on port 22.
Update the Installation
It is always a good approach to install latest updates
sudo yum update -yHAProxy Installation
Install HAProxy package
yum install haproxy -yBackup Original Configuration
Backup the default configuration which can be used in case we want to start over
cp /etc/haproxy/haproxy.cfg /etc/haproxy/haproxy.cfg.bakEdit Openconnect Server Configuration
We need to reconfigure the Openconnect Server to free the port tcp/443 which will be used by HAProxy.
cat > /etc/ocserv/ocserv.conf <<'EOF'
enable-auth = "plain[passwd=/etc/ocserv/ocpasswd]"
auth = "certificate"
listen-host = 127.0.0.1 ################################# Update this line to 127.0.0.1
udp-listen-host = 10.0.0.154 ############################ Update this line to the Machine IP
tcp-port = 443
udp-port = 443
run-as-user = ocserv
run-as-group = ocserv
socket-file = ocserv.sock
chroot-dir = /var/lib/ocserv
server-cert = /etc/letsencrypt/live/vpn.induslevel.com/fullchain.pem
server-key = /etc/letsencrypt/live/vpn.induslevel.com/privkey.pem
ca-cert = /etc/ocserv/ssl/ca-cert.pem
isolate-workers = true
max-clients = 16
max-same-clients = 2
listen-proxy-proto = true
rate-limit-ms = 100
server-stats-reset-time = 604800
keepalive = 32400
dpd = 90
mobile-dpd = 1800
switch-to-tcp-timeout = 25
try-mtu-discovery = true
cert-user-oid = 0.9.2342.19200300.100.1.1
tls-priorities = "NORMAL:%SERVER_PRECEDENCE"
auth-timeout = 240
min-reauth-time = 300
max-ban-score = 80
ban-reset-time = 1200
cookie-timeout = 300
deny-roaming = false
rekey-time = 172800
rekey-method = ssl
use-occtl = true
pid-file = /var/run/ocserv.pid
log-level = 1
device = vpns
predictable-ips = true
default-domain = vpn.induslevel.com
ipv4-network = 192.168.250.0/24
dns = 1.1.1.3
ping-leases = false
no-route = 192.168.5.0/255.255.255.0
cisco-client-compat = true
dtls-legacy = true
cisco-svc-client-compat = false
client-bypass-protocol = false
camouflage = false
camouflage_secret = "mysecretkey"
camouflage_realm = "Restricted Content"
included-http-headers = Strict-Transport-Security: max-age=31536000 ; includeSubDomains
included-http-headers = X-Frame-Options: deny
included-http-headers = X-Content-Type-Options: nosniff
included-http-headers = Content-Security-Policy: default-src 'none'
included-http-headers = X-Permitted-Cross-Domain-Policies: none
included-http-headers = Referrer-Policy: no-referrer
included-http-headers = Clear-Site-Data: "cache","cookies","storage"
included-http-headers = Cross-Origin-Embedder-Policy: require-corp
included-http-headers = Cross-Origin-Opener-Policy: same-origin
included-http-headers = Cross-Origin-Resource-Policy: same-origin
included-http-headers = X-XSS-Protection: 0
included-http-headers = Pragma: no-cache
included-http-headers = Cache-control: no-store, no-cache
EOF
Reload the Configuration
Restart the Openconnect service to reload new configuration
systemctl restart ocservVerify the Service
Check the netstat output to see if the Openconnect server is running on 127.0.0.1:443
netstat -anp|grep ocservOutput:
tcp  0  0 127.0.0.1:443  0.0.0.0:*          LISTEN      2063/ocserv-main
udp  0  0 10.0.0.154:443 0.0.0.0:*                      2063/ocserv-main
Edit HAProxy Configuration
We need to setup frontend and backend configuration in HAProxy. Setting up frontend will enable HAProxy to listen on port 443 and pass the traffic to backend server which in Openconnect and SSH service depending upon the type of incoming traffic.
cat > /etc/haproxy/haproxy.conf <<'EOF'
global
    log         127.0.0.1 local2
    chroot      /var/lib/haproxy
    pidfile     /var/run/haproxy.pid
    maxconn     4000
    user        haproxy
    group       haproxy
    daemon
defaults
    mode                    tcp
    log                     global
    option                  tcplog
    option                  dontlognull
    option http-server-close
    option                  redispatch
    retries                 3
    timeout http-request    10s
    timeout queue           1m
    timeout connect         10s
    timeout client          1m
    timeout server          1m
    timeout http-keep-alive 10s
    timeout check           10s
    maxconn                 3000
frontend https
   bind 10.0.0.154:443 ############################################Listen on port 443
   mode tcp
   tcp-request inspect-delay 5s
   tcp-request content accept if { req_ssl_hello_type 1 }
   acl is_ssh payload(0,7) -m bin 5353482d322e30  ##### checking if the payload for ssh connection
   use_backend ssh if is_ssh ######################if it is ssh then send traffic to ssh port 22
   use_backend ocserv if { req_ssl_sni -i us-vpn.induslevel.com } ## check SNI field for vpn URL
backend ocserv
   mode tcp
   option ssl-hello-chk
   server ocserv 127.0.0.1:443 send-proxy-v2
backend ssh
    mode tcp
    server ssh-server 127.0.0.3:22 check
EOF
Service Start
Start the HAProxy service
systemctl start haproxyEnable on Boot
Enable the service to start on system boot
systemctl enable haproxyCheck SSH Connectivity
SSH to the VM using ssh client such as Kitty on port 443.
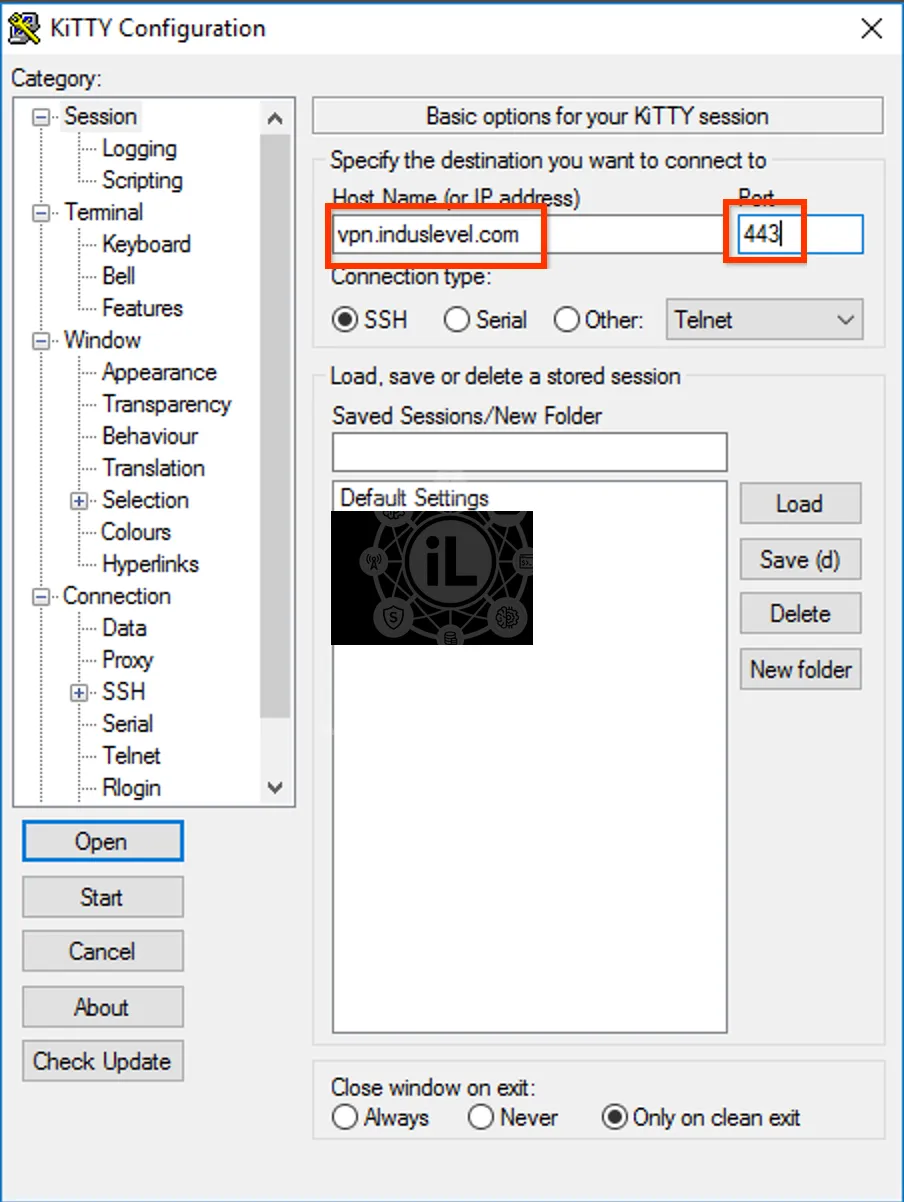
Check VPN Connectivity
Open the Cisco Anyconnect app.

- Click on the Connections.

- Click on the Plus sign.

- Add name and URL for the server and press Done.

- Connection has been added.

- Click on the toggle button to start the connection.

- You will be asked for username. Enter username and press Connect.
- Enter the password and press Connect.

- You will see connected status.

Check your IP using whatismyip.com.


