
I have my friends in MENA region who cannot connect with me with over WhatsApp because audio and video calls are blocked in countries in MENA region. They can use some freely available VPN services but with a compromise of eavesdropping.
I have setup OpenConnect VPN server (ocserv), an open source Linux SSL VPN server which enables to encrypt the traffic therefore saving you from eavesdropping.
Prerequisites
We are going to install the VPN server on CentOS 7. You need to have public IP assigned to the machine.
Update the Installation
It is always a good approach to install latest updates
sudo yum update -yEPEL Repository
OpenConnect package is available in EPEL repository. Therefore, install the epel-release package
yum install epel-release -yCertbot Installation
Install certbot for obtaining the Lets Encrypt signed certificate
yum install certbot -yOpenConnect Installation
Install the OpenConnect Server package
yum install ocserv -yFirewall Setup
Open firewall ports and enable NAT
firewall-cmd --permanent --zone=public --add-port=443/udp
firewall-cmd --permanent --zone=public --add-port=443/tcp
firewall-cmd --zone=public --permanent --add-masquerade
firewall-cmd --reload
IP Forwarding
Enable IP forwarding
echo "net.ipv4.ip_forward = 1" | sudo tee /etc/sysctl.d/70-custom.conf
echo "net.core.default_qdisc=fq" | sudo tee -a /etc/sysctl.d/70-custom.conf
echo "net.ipv4.tcp_congestion_control=bbr" | sudo tee -a /etc/sysctl.d/70-custom.conf
sysctl -p /etc/sysctl.d/70-custom.conf
SSL Certificate
Make sure your URL is resolvable. Afterwards, get signed certificates
certbot certonly --standalone --preferred-challenges http --agree-tos --email support@induslevel.com -d vpn.induslevel.comBackup Original Configuration
Backup the default configuration which can be used in case we want to start over
cp /etc/ocserv/ocserv.conf /etc/ocserv/ocserv.conf.bakEdit Server Configuration
Add your configuration. See the comments in the configuration file which have been modified
cat > /etc/ocserv/ocserv.conf <<'EOF'
auth = "plain[passwd=/etc/ocserv/ocpasswd]" #### Using the credentials from this file
tcp-port = 443
udp-port = 443
run-as-user = ocserv
run-as-group = ocserv
socket-file = ocserv.sock
chroot-dir = /var/lib/ocserv
server-cert = /etc/letsencrypt/live/vpn.induslevel.com/fullchain.pem ### Update the path to certificate file obtained from LetsEncrypt
server-key = /etc/letsencrypt/live/vpn.induslevel.com/privkey.pem  ### Update the path to private key file obtained from LetsEncrypt
ca-cert = /etc/ocserv/ssl/ca-cert.pem
isolate-workers = true
max-clients = 16
max-same-clients = 2
rate-limit-ms = 100
server-stats-reset-time = 604800
keepalive = 32400
dpd = 90
mobile-dpd = 1800
switch-to-tcp-timeout = 25
try-mtu-discovery = true #################### Enabled this option for traffic optimization
cert-user-oid = 0.9.2342.19200300.100.1.1
tls-priorities = "NORMAL:%SERVER_PRECEDENCE"
auth-timeout = 240
min-reauth-time = 300
max-ban-score = 80
ban-reset-time = 1200
cookie-timeout = 300
deny-roaming = false
rekey-time = 172800
rekey-method = ssl
use-occtl = true
pid-file = /var/run/ocserv.pid
log-level = 1
device = vpns
predictable-ips = true
default-domain = vpn.induslevel.com ########### Update the domain URL
ipv4-network = 192.168.250.0/24 ##### Use the subnet that is not being used in your existing network
dns = 1.1.1.3 ############## Using CloudFlare DNS for families to block Malware or Adult Content
ping-leases = false
no-route = 192.168.5.0/255.255.255.0
cisco-client-compat = true
dtls-legacy = true
cisco-svc-client-compat = false
client-bypass-protocol = false
camouflage = false
camouflage_secret = "mysecretkey"
camouflage_realm = "Restricted Content"
included-http-headers = Strict-Transport-Security: max-age=31536000 ; includeSubDomains
included-http-headers = X-Frame-Options: deny
included-http-headers = X-Content-Type-Options: nosniff
included-http-headers = Content-Security-Policy: default-src 'none'
included-http-headers = X-Permitted-Cross-Domain-Policies: none
included-http-headers = Referrer-Policy: no-referrer
included-http-headers = Clear-Site-Data: "cache","cookies","storage"
included-http-headers = Cross-Origin-Embedder-Policy: require-corp
included-http-headers = Cross-Origin-Opener-Policy: same-origin
included-http-headers = Cross-Origin-Resource-Policy: same-origin
included-http-headers = X-XSS-Protection: 0
included-http-headers = Pragma: no-cache
included-http-headers = Cache-control: no-store, no-cache
EOF
Start Service
Start the service
systemctl start ocservEnable on Boot
Enable the service to start at boot time
systemctl enable ocservService Status
Check status of the service
systemctl status ocservUser Creation
Create user. You will be asked for the password
ocpasswd -c /etc/ocserv/ocpasswd vpnuserVPN Client Application
Install Cisco AnyConnect Application on your mobile
Client Setup
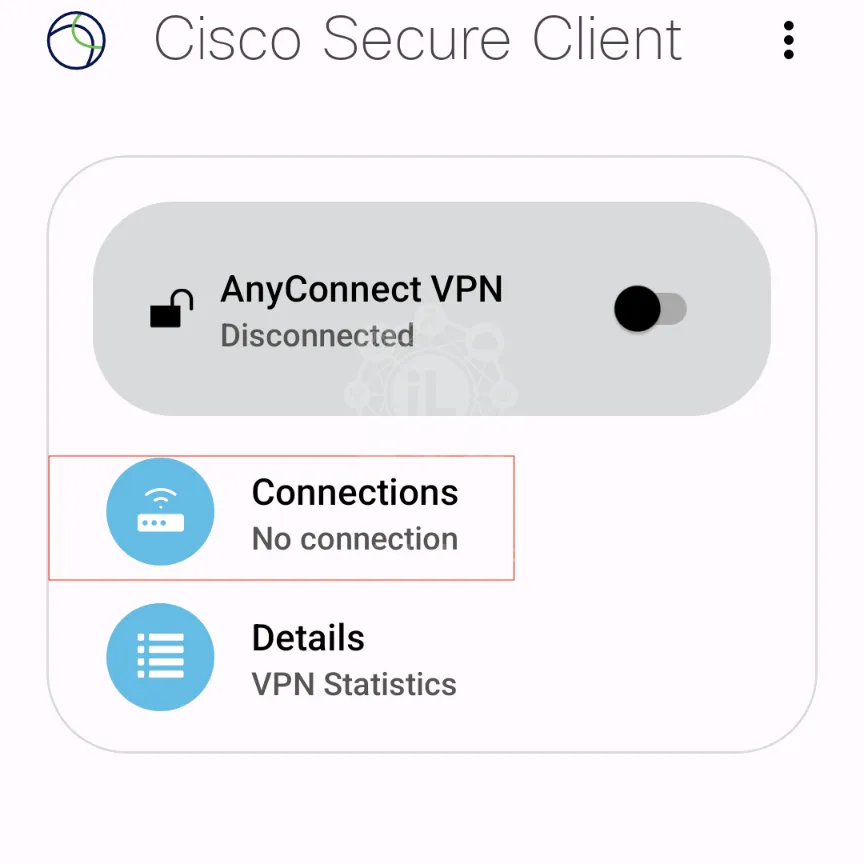
Once the application is installed, open the app.
- Click on the Connections.
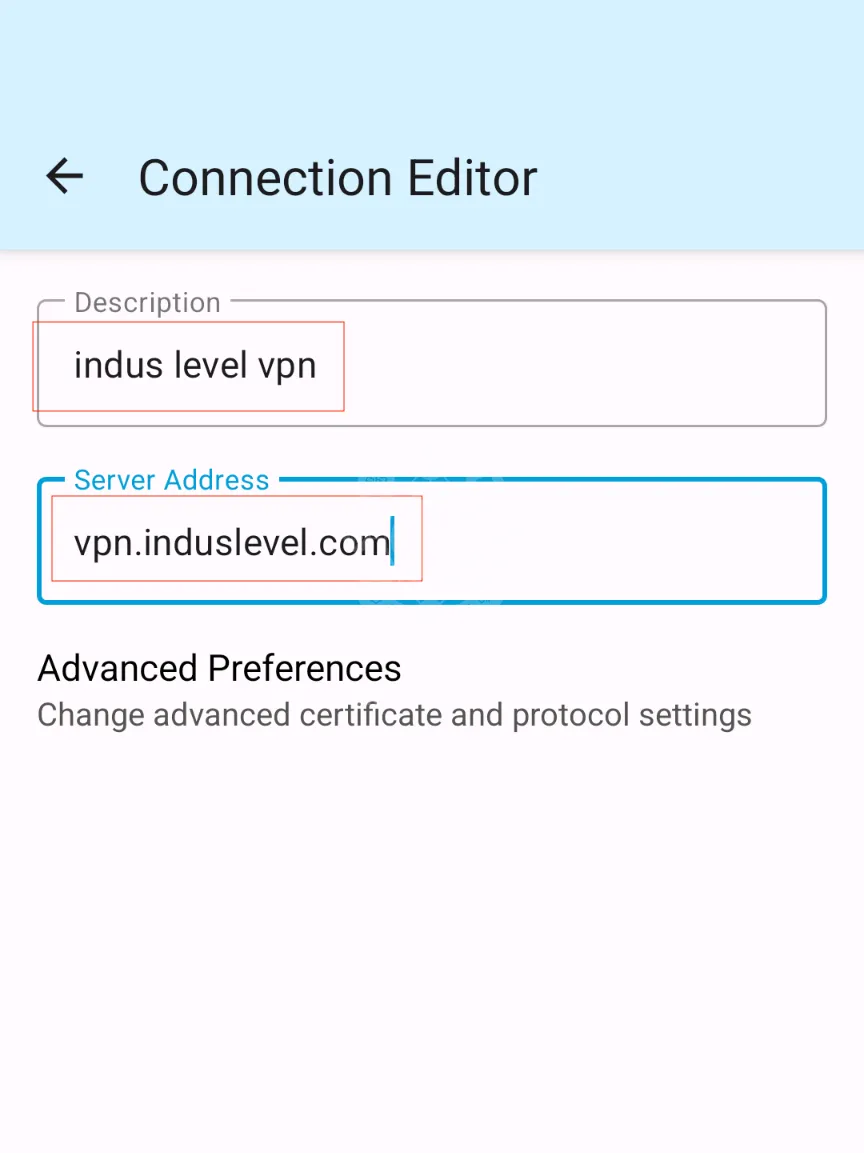
- Click on the Plus sign.

- Add name and URL for the server and press Done.
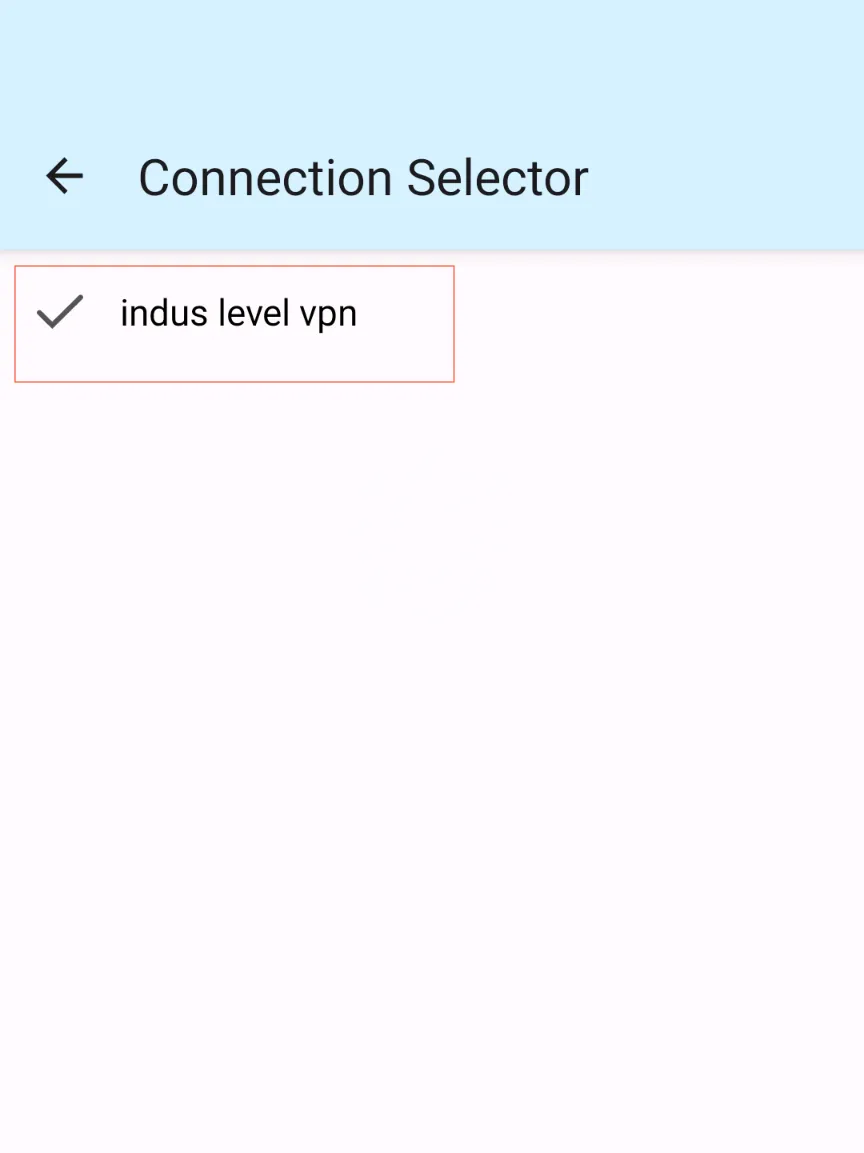
- Connection has been added.
- Click on the toggle button to start the connection.
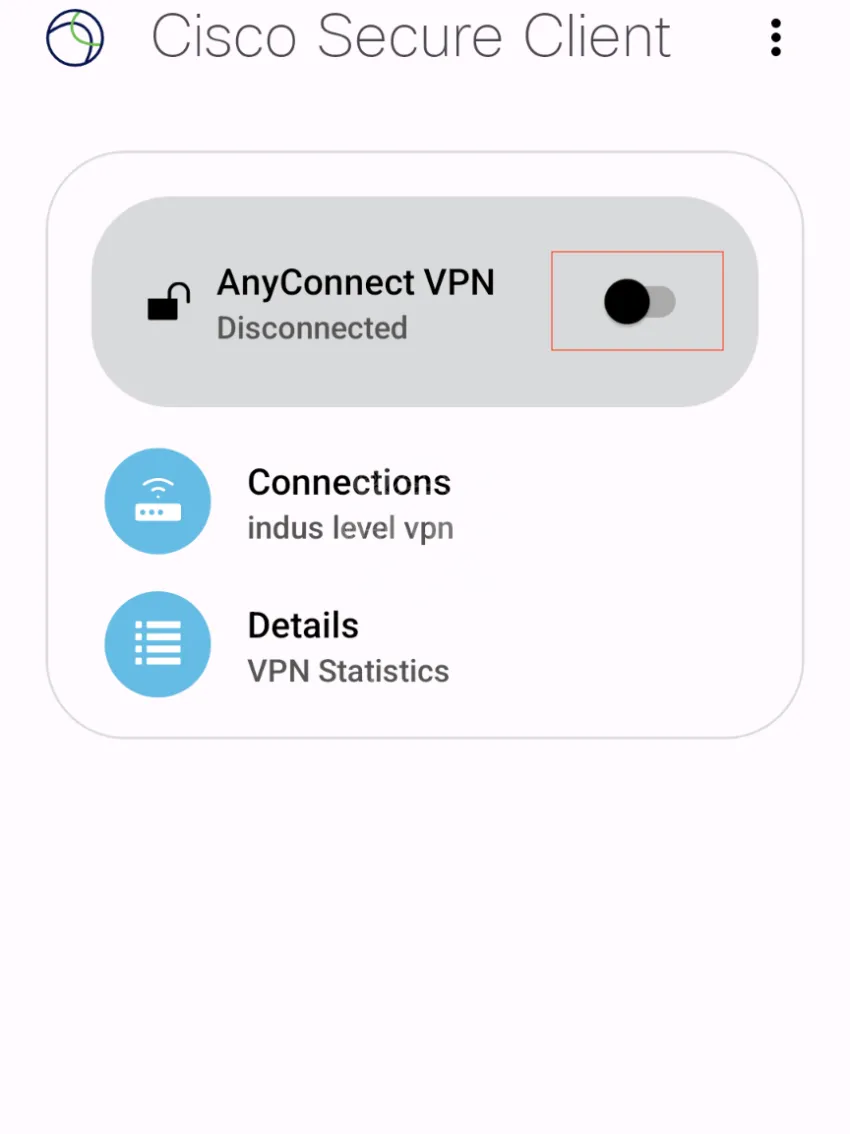
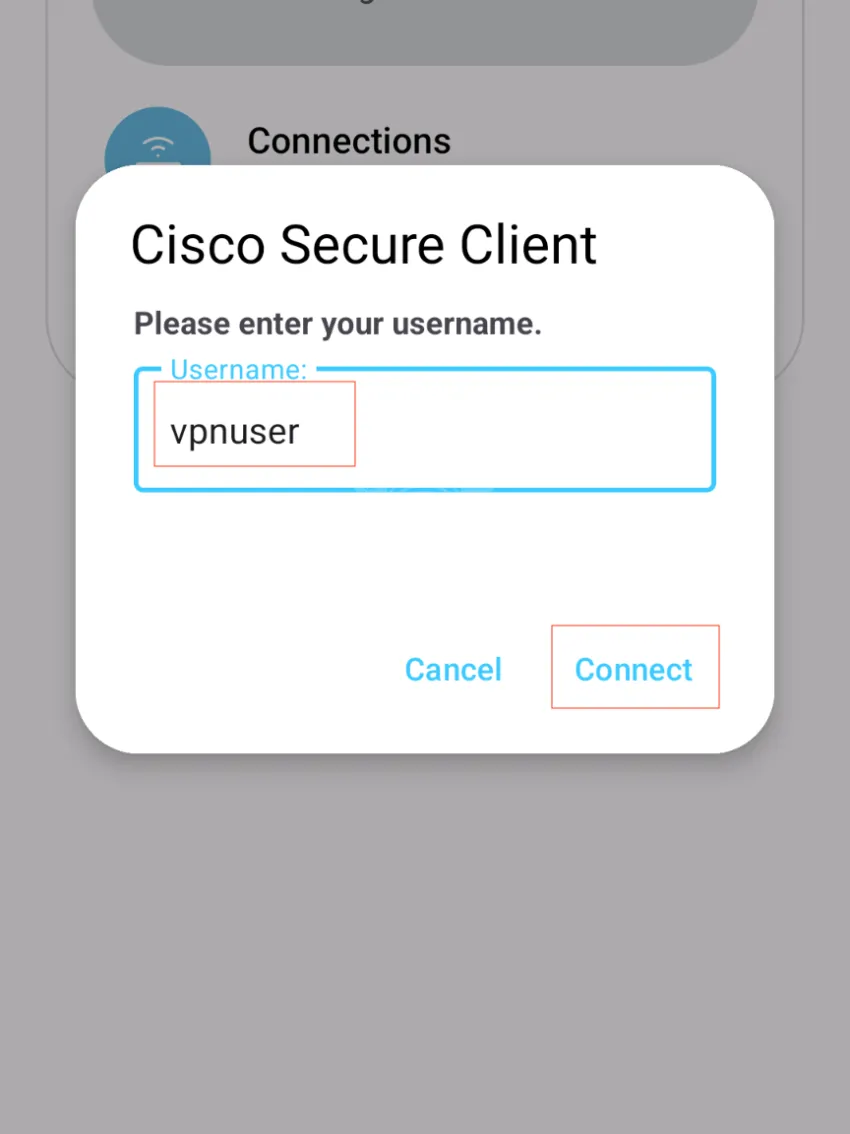
- You will be asked for username. Enter username and press Connect.
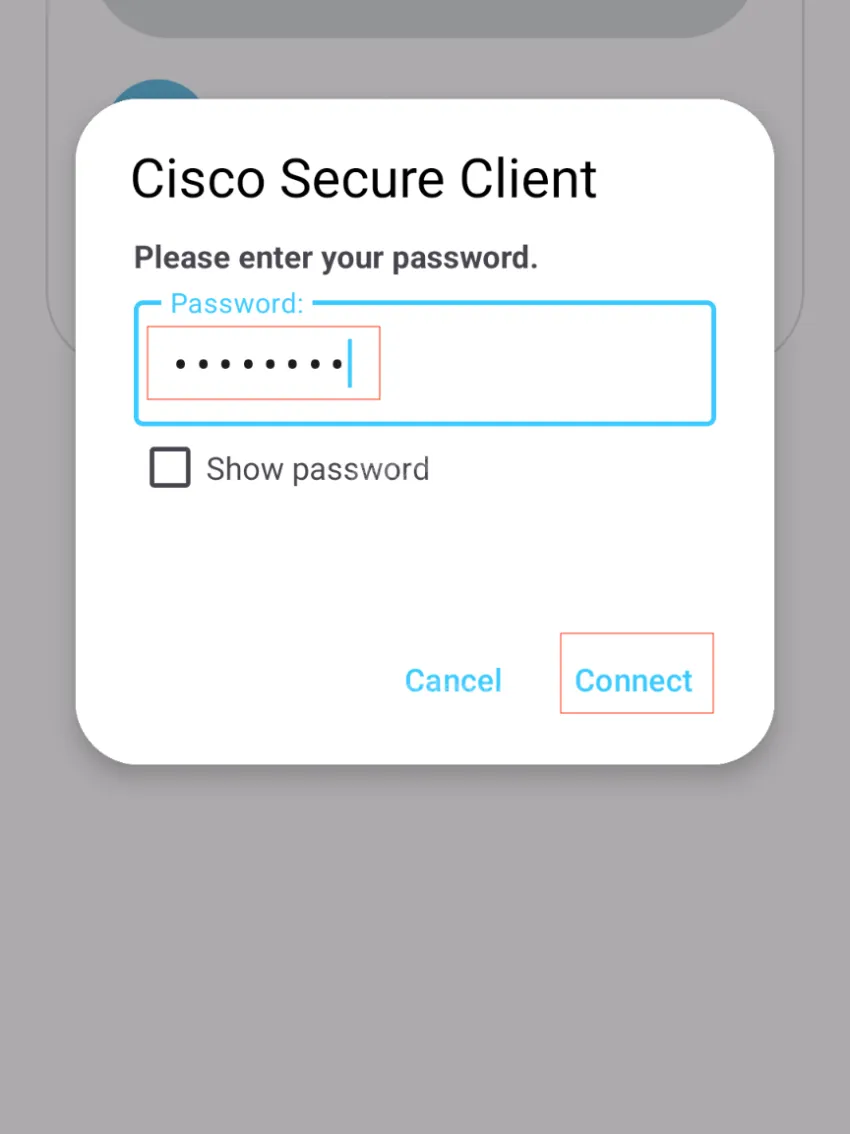
- Enter the password and press Connect.
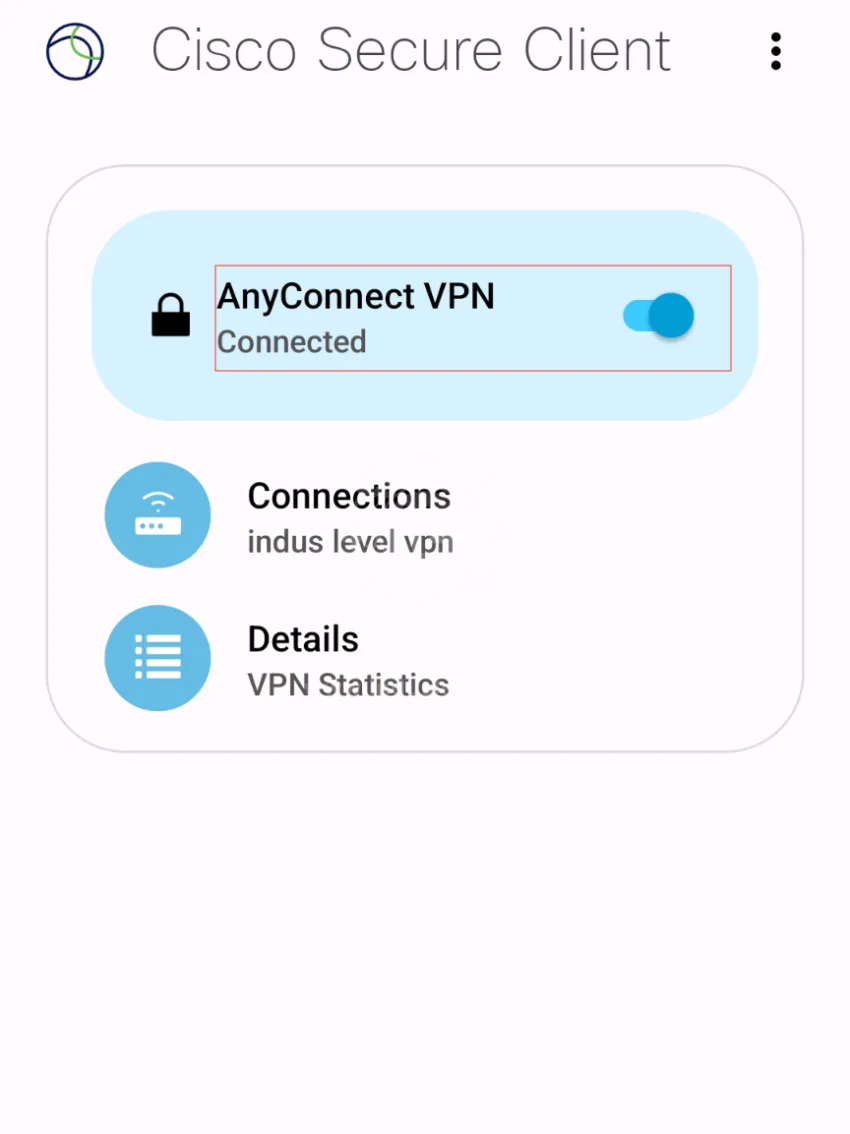
- You will see connected status.
- Check your IP using whatismyip.com.


